Connect your employees with Meta Learn in under 1 minute.
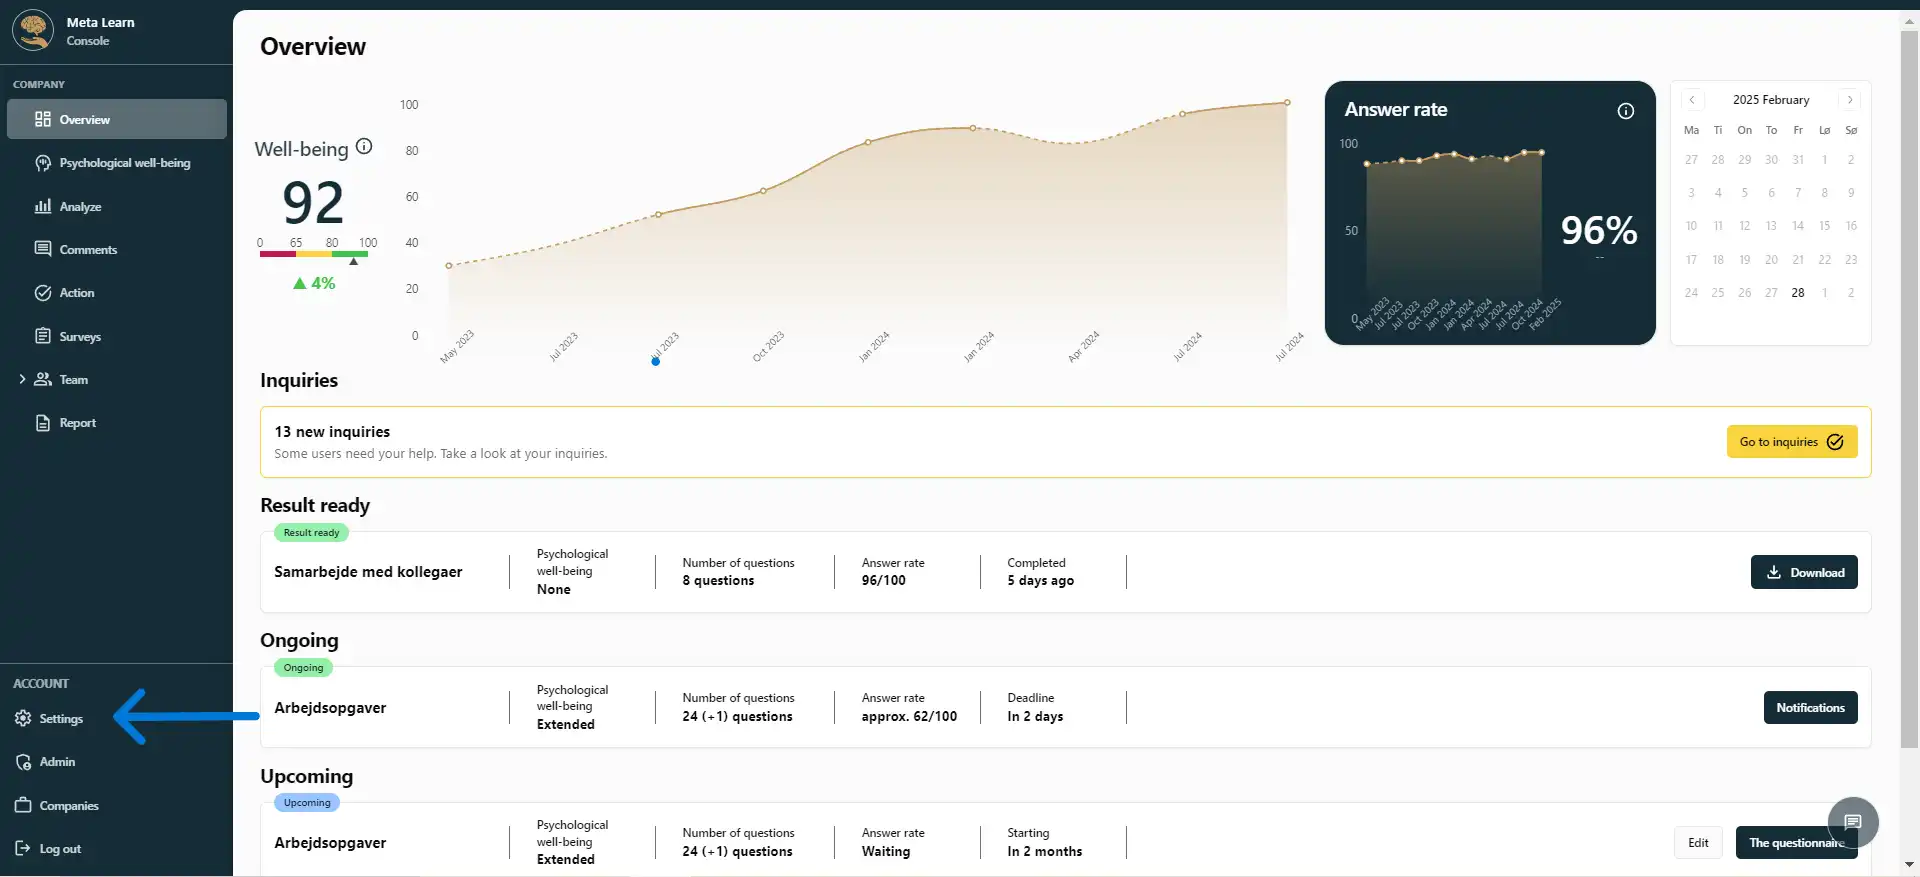
Settings (Step 1)
Start by clicking on "Settings".
(see the image below)
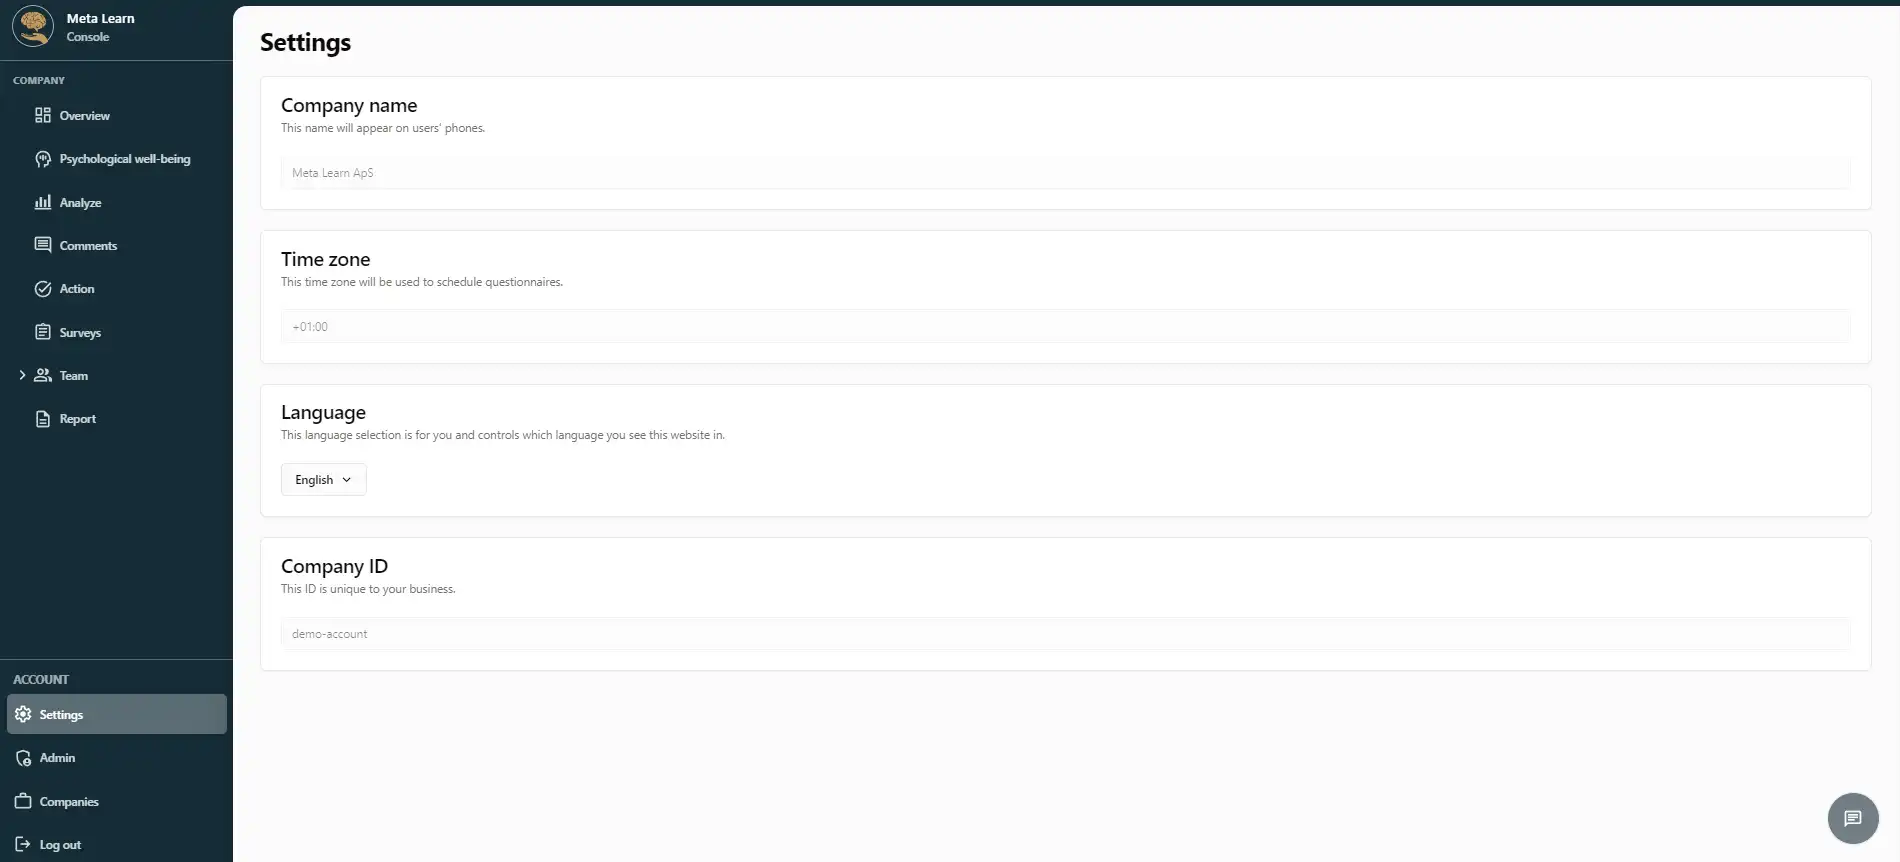
Settings (Step 2)
Here, you can see the company name, time zone, language, and Company ID.
(see the image below)
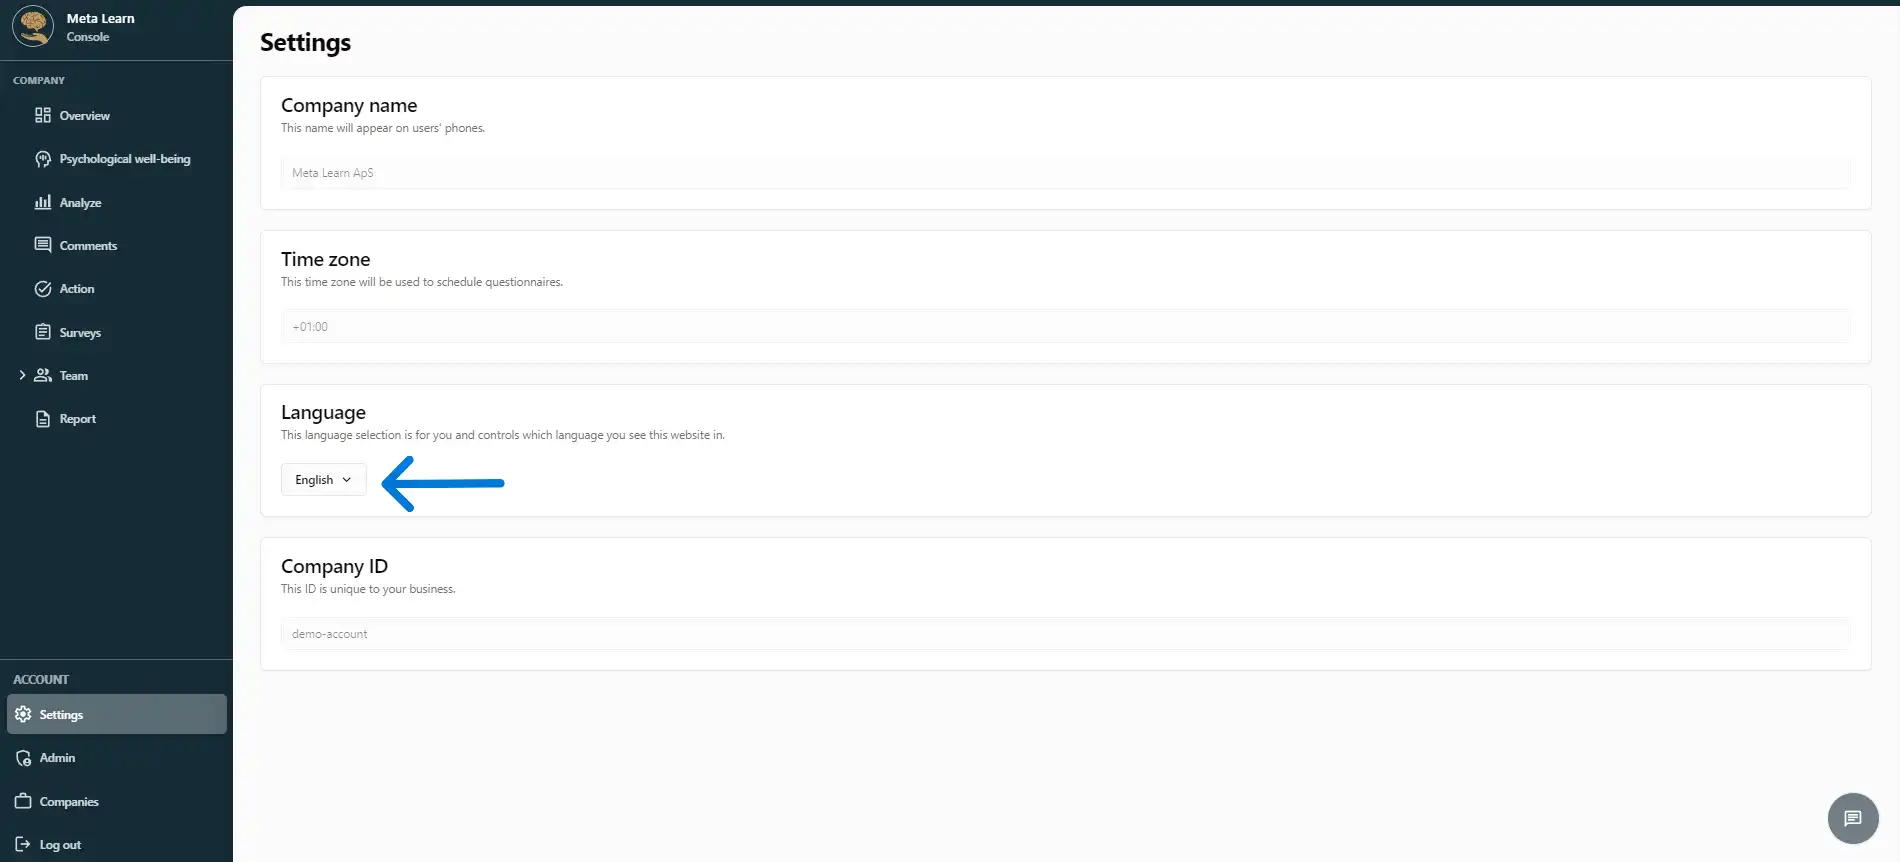
Settings (Step 3)
If you want to change the platform language, click on "Language", where you can switch between 29 languages, including Danish, German, and English.
(see the image below)
Admin (Step 1)
Start by clicking on "Admin".
(see the image below)

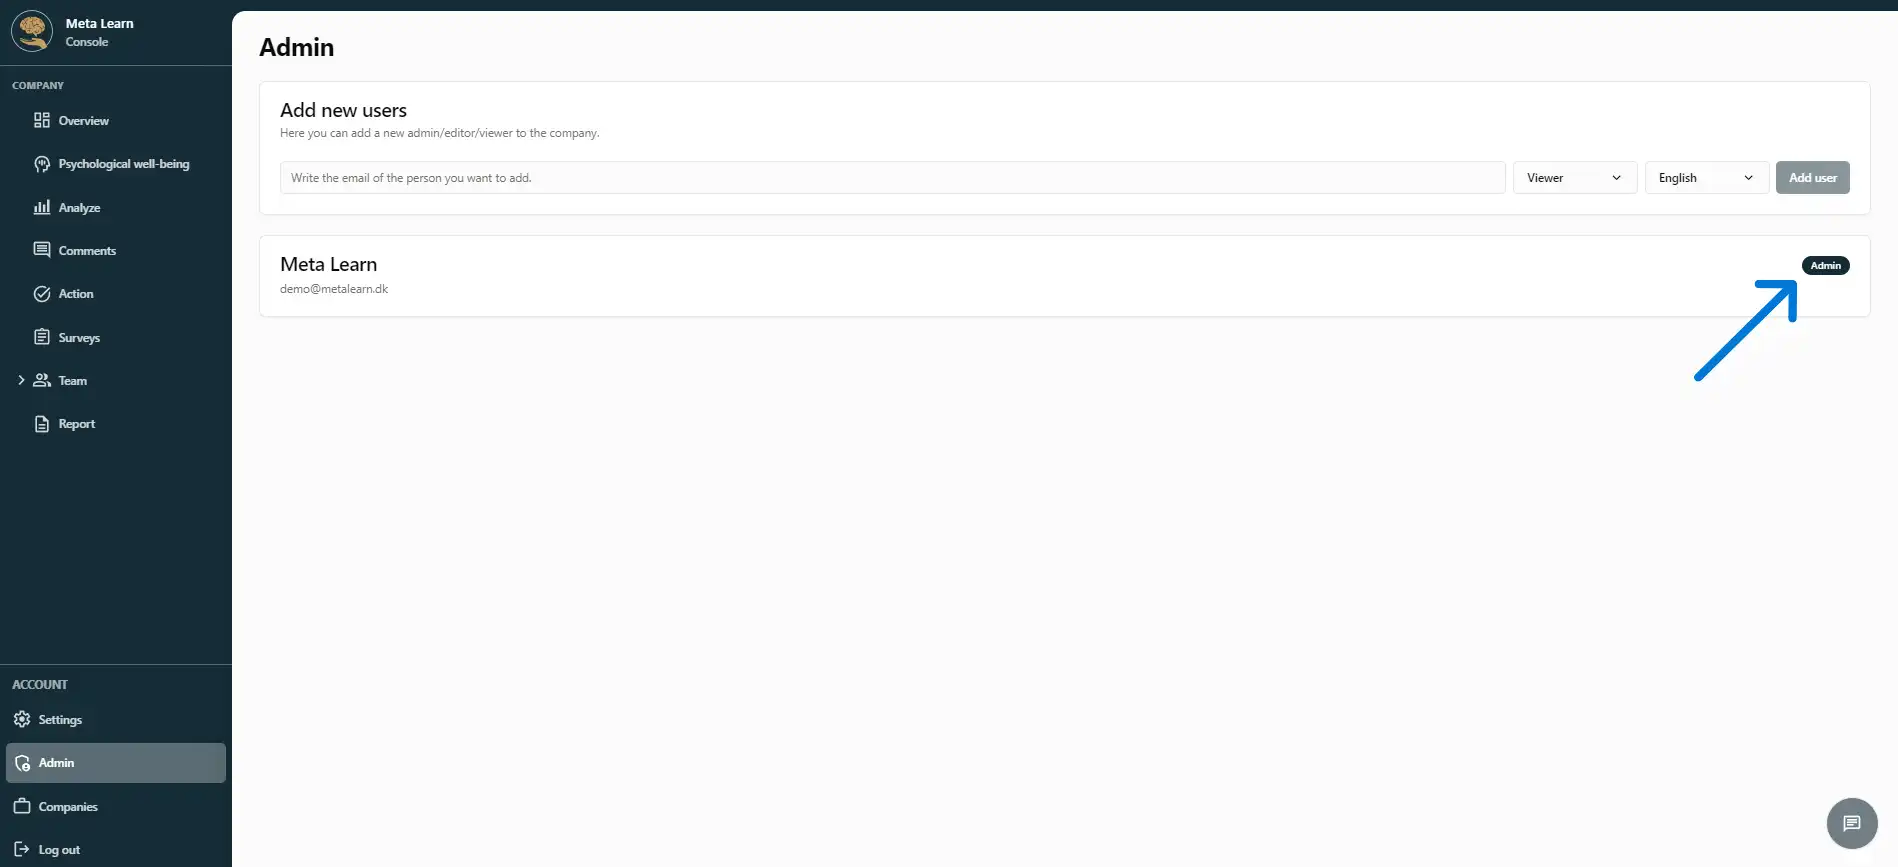
Admin (Step 2)
Here, you can see who has "Admin" access to the platform by looking at the small tag on the right side.
(see the image below)
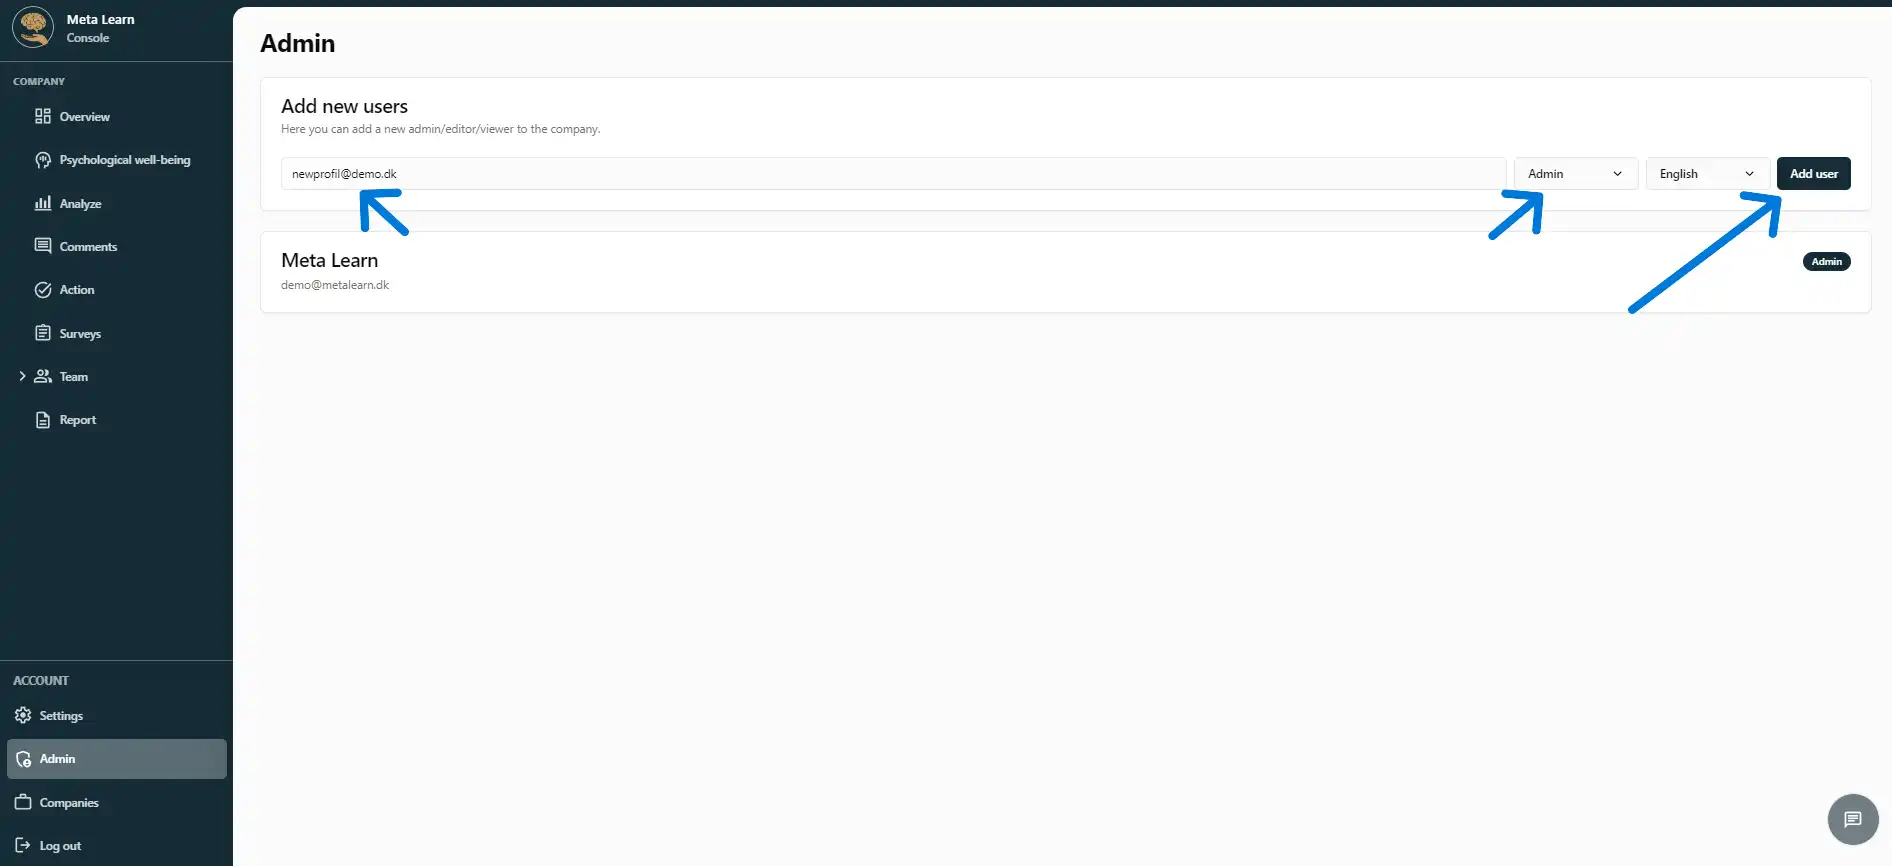
Admin (Step 3)
If you want to grant additional users access to the platform, you can add their email, select their access level, and then click "Add user" to invite them to the platform.
(see the image below)
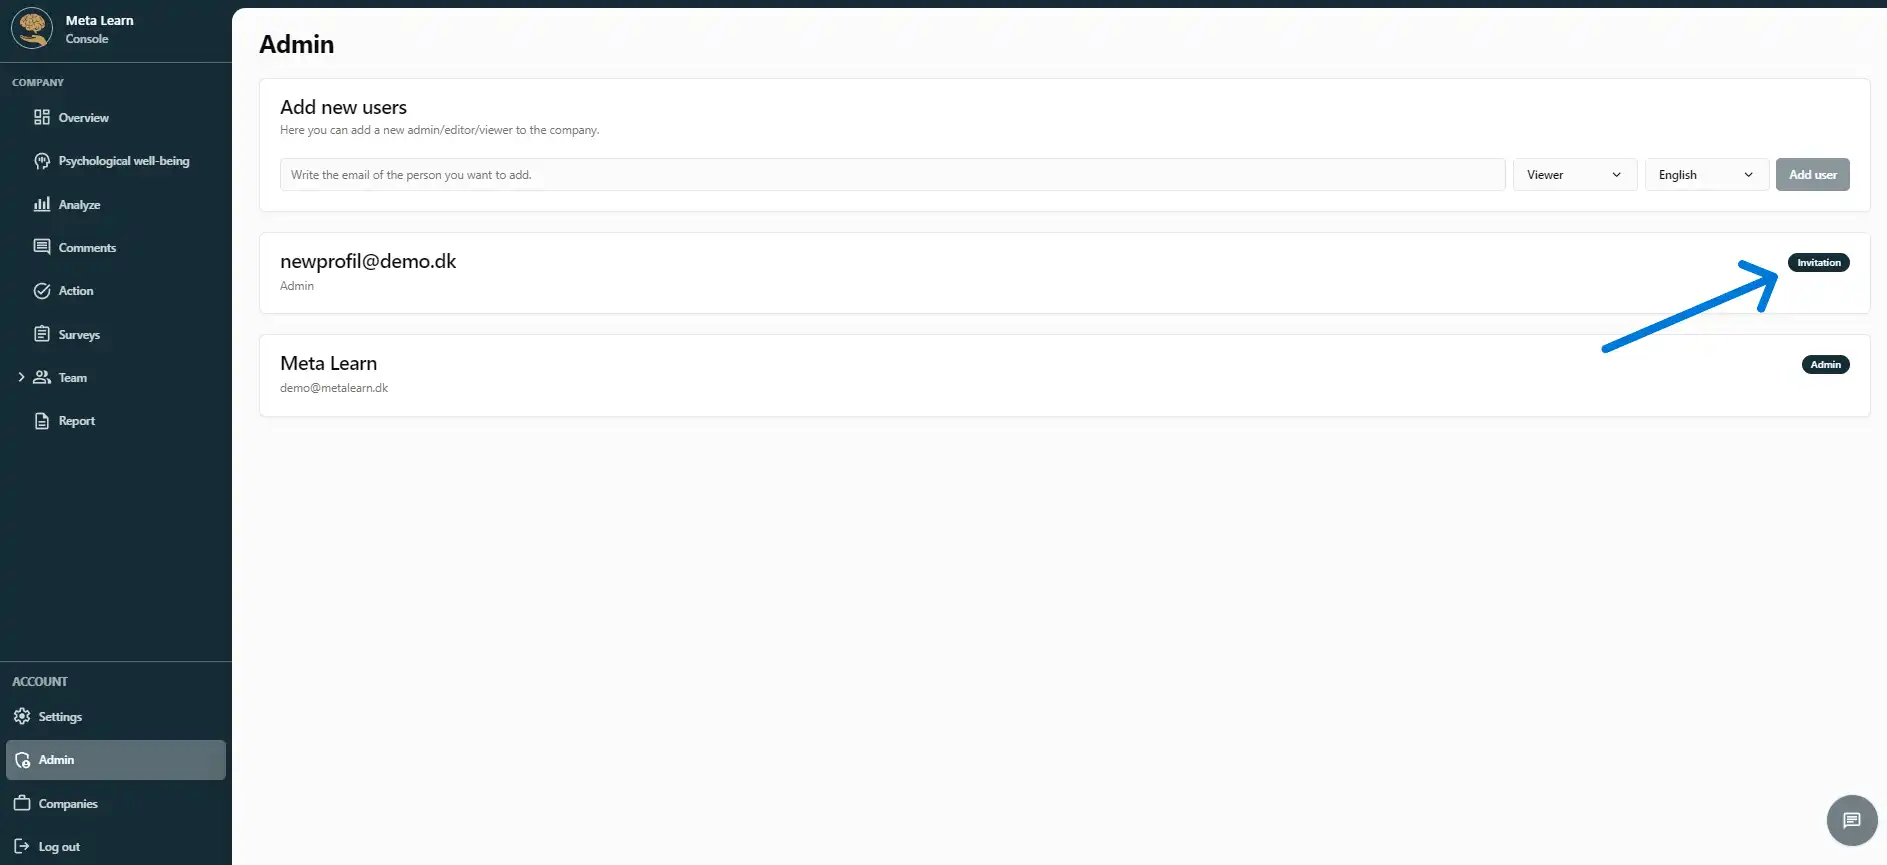
Admin (Step 4)
Once you have added a new Admin user, they must confirm the invitation via email before gaining access to the platform.
Note that users with Admin access can remove, delete, and add content as they see fit. Be mindful of whom you grant Admin privileges to.
After the new user is invited, you will see their profile created, and "Invitation" will appear in the right corner next to their email.
(see the image below)
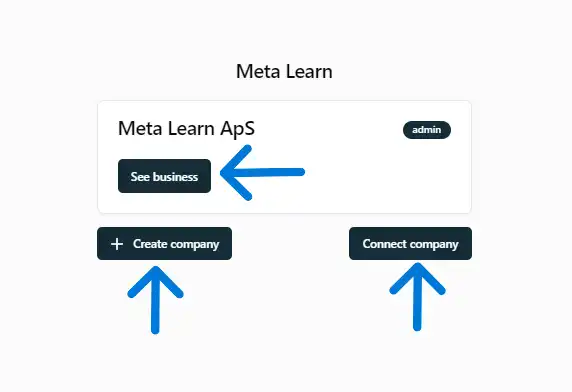
Companies (Step 1)
Start by clicking on "Companies".
(see the image below)

Companies (Step 2)
Here, you can get an overview of the companies you have access to.
You can also create a new company or connect to an existing one.
(see the image below)